Nowadays, to develop web applications, we have increasingly gained the flexibility to choose desired programming languages and then select available options of libraries or frameworks to be utilised.
One of the available library choices when opting for the JavaScript or TypeScript programming language is the React.js library.
The discussion will include the following points:
● Why use React.js?
● How to initiate a React.js project?
● And what are the fundamental uses of React.js?
Why Use React.js?
1️⃣ Large Ecosystem
The size of a library or framework ecosystem is one of the considerations in choosing a library or framework. Finding answers can also be challenging when a rarely used tool is employed due to the need for more information from others.
The substantial number of React.js library users can be observed from GitHub stars, the quantity of React-related questions asked on StackOverflow, and the download count on NPM.
The React.js repository has over 200,000 stars (as of August 2023).

On Stack Overflow, more than 400,000 questions are tagged with React.js (as of August 2023).

And there are over 20 million weekly downloads on NPM (August 2023).

In addition, React.js uses the programming languages JavaScript and TypeScript, which are among the top five most popular programming languages in use (as of 2023).

These indicators signify the extensive React.js ecosystem with a large user base, which makes it easier to ask and find answers to existing questions. This could be a decisive factor in choosing React.js.
2️⃣ Reusability and Maintainability
In React.js, we can flexibly organise the project’s structure. Some characteristics of React.js are as follows:
Modularity: Components are modular units that can be developed, tested, and maintained independently. This modular approach makes it easier to understand and modify specific application parts without affecting other parts of the codebase.
Separation of Concerns: React.js enforces a clear separation between UI and application logic. This separation simplifies the identification process regarding where specific functionality is implemented, enhancing code readability and maintainability.
Single Source of Truth: React.js promotes a unidirectional data flow, where parent components pass data to their child components. This pattern helps avoid complex data dependencies and facilitates tracking changes in the application’s state.
From these three aspects, we can separate components according to their functions and track the data sources in a manageable manner within a single, straightforward source.
3️⃣ Fast Refresh
Fast Refresh is a built-in feature of React.js that allows developers to review changes directly after the code changes are saved.
The improvement in development experience reduces the time for refreshing every time a change is made.
4️⃣ Relatively Straightforward Deployment
There are only so many abstractions in deploying using React.js.
- We can build a React.js project that eventually generates a static web project that can be uploaded to a host.
- Another option is to upload the project to a server and run it with PM2.
- We can also upload the project to a repository and connect that repository to PAAS platforms like Heroku, Vercel, Netlify, or others. Once the platform is connected to the repository, the platform will automatically handle the building and deployment processes, and we need to wait for the process to finish and get the URL where the project has been deployed.
How to Initiate a React.js Project?
Since React.js is a JavaScript library, we can run it with Node.js. We are installing Node.js by downloading it from https://nodejs.org/en/download and running the installer.
After installing Node.js, npm and npx will be automatically installed alongside Node. The npm command is used for managing Node.js packages locally, such as installing, uninstalling, updating, and so on. On the other hand, npx is used to run Node.js package commands without installing the package locally.
Here, we will use commands from the create-react-app package. We don’t need to install the create-react-app package but rather run its commands to generate a React project locally.
Open the command prompt (Windows) or terminal (Mac/Linux), then navigate to the destination folder using the cd command. In the project folder destination, execute the command below:
npx create-react-app my-react-projectThis command will generate a React.js project named “my-react-project”. The name can be changed before pressing enter; the project name should consist of alphabetic characters, and it is possible to use dashes (-) or underscores (_) if needed.
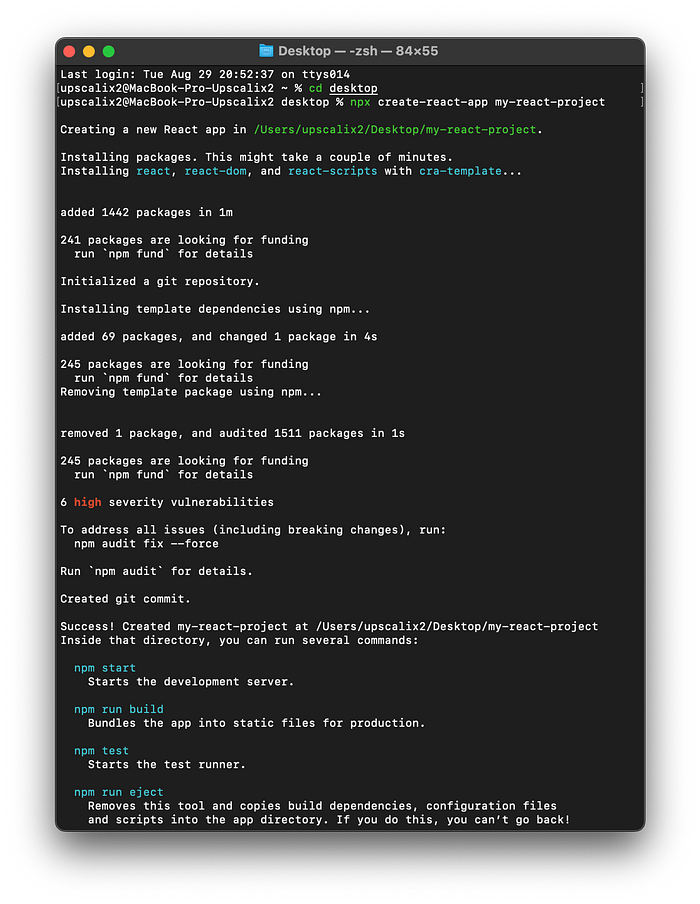
A new React.js project has been successfully generated.
What Are the Fundamental Uses of React.js?
1️⃣ Project Structure
React.js utilises the JavaScript programming language, and naturally, the file extension for its scripts is .js.
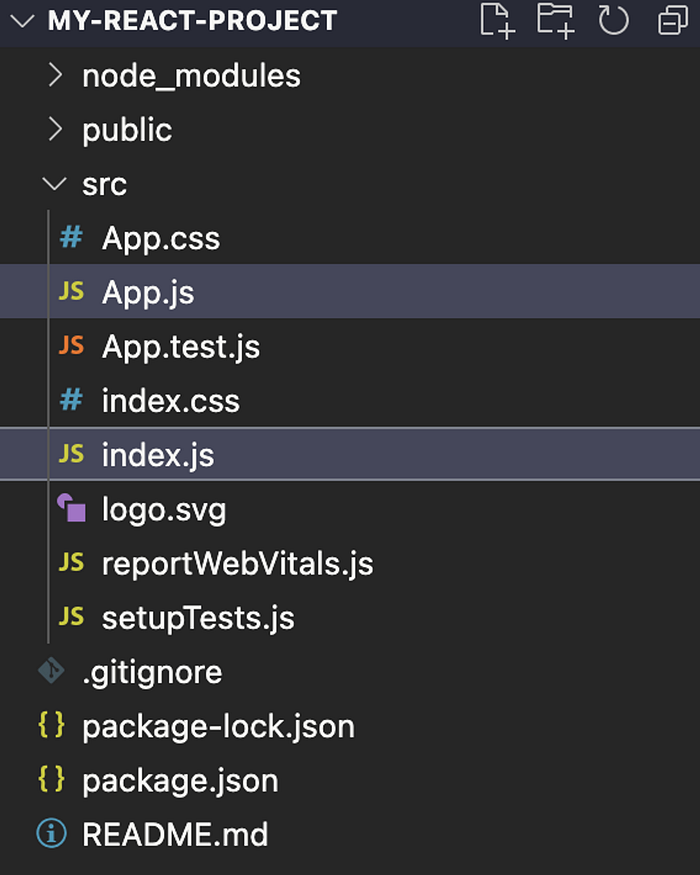
The index.js file is the primary entry point accessed first and is responsible for rendering the web application’s App.js file.
App.js serves as the default initial page and is displayed first.
In React.js, page files typically involve importing other .js scripts, then declaring components that return UI declarations and exporting.
The UI declaration is written similarly to HTML, as shown below.
function App() {
  const exampleVariable = "Example Text";

  return (
    <div
      style={{
        alignItems: "center",
        display: "flex",
        flexDirection: "column"
      }}
    >
      <h1>
        Header Text
      </h1>

      <p>
        {exampleVariable}
      </p>
    </div>
  )
}

export default App;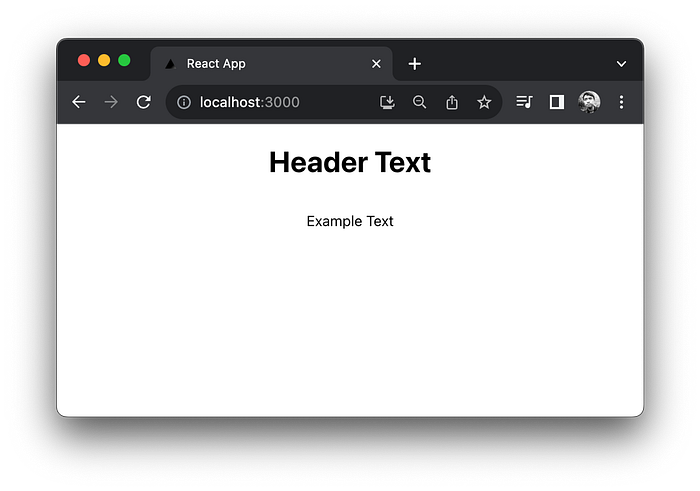
As seen, we can also display variables within the text by enclosing the variable’s name in curly braces {} between tags (here, for example, <p></p>).
2️⃣ Components and Props
A component separates a UI part into an independent file that can be accessed across different scripts, with its declaration needed only once in a file.
To understand the benefits of this component concept, consider the example below.
From the example above, we obtain the code as shown below.
import React from 'react';
export function App() {
return (
<div
style={{
display: 'flex'
}}
>
<div
style={{
backgroundColor: 'white',
borderRadius: 10,
display: 'flex',
flexDirection: 'column',
overflow: 'hidden',
width: 150,
margin: 5,
}}
>
<img
src="https://images.unsplash.com/photo-1692744642837-0afc5b12912b?ixlib=rb-4.0.3&ixid=M3wxMjA3fDB8MHxwaG90by1wYWdlfHx8fGVufDB8fHx8fA%3D%3D&auto=format&fit=crop&w=774&q=80"
width="150"
/>
<div
style={{
fontWeight: 'bold',
padding: 10
}}
>
Escalator
</div>
</div>
<div
style={{
backgroundColor: 'white',
borderRadius: 10,
display: 'flex',
flexDirection: 'column',
overflow: 'hidden',
width: 150,
margin: 5,
}}
>
<img
src="https://images.unsplash.com/photo-1682685797229-b2930538da47?ixlib=rb-4.0.3&ixid=M3wxMjA3fDF8MHxwaG90by1wYWdlfHx8fGVufDB8fHx8fA%3D%3D&auto=format&fit=crop&w=774&q=80"
width="150"
/>
<div
style={{
fontWeight: 'bold',
padding: 10
}}
>
Dry Land
</div>
</div>
</div>
);
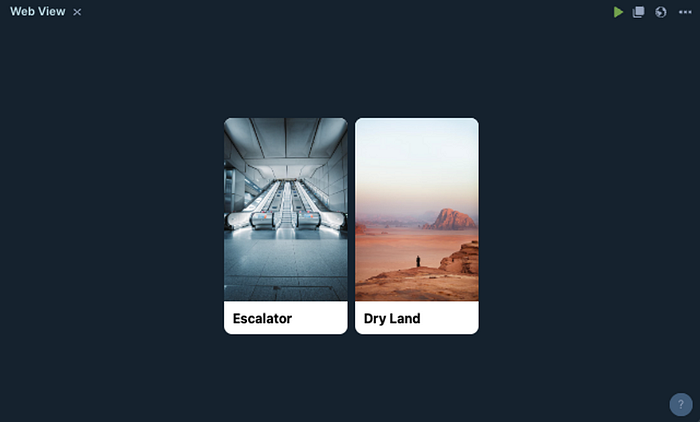
}To display two cards (Escalator and Dry Land), we observe that there is duplicated code that is nearly identical. This is just for displaying two cards. What if we want to show five cards? Ten cards? Or even more? Therefore, we need to separate this card UI into its components. After that, we can call this component repeatedly without much code duplication.
import React from 'react';

export function Card(props) {
  return (
    <div
      style={{
        backgroundColor: 'white',
        borderRadius: 10,
        display: 'flex',
        flexDirection: 'column',
        overflow: 'hidden',
        width: 150,
        margin: 5,
      }}
    >
      <img
        src={props.imageSrc}
        width="150"
      />

      <div
        style={{
          fontWeight: 'bold',
          padding: 10
        }}
      >
        {props.label}
      </div>
    </div>
  )
}

export function App() {
  return (
    <div
      style={{
        display: 'flex'
      }}
    >
      <Card
        imageSrc="https://images.unsplash.com/photo-1692744642837-0afc5b12912b?ixlib=rb-4.0.3&ixid=M3wxMjA3fDB8MHxwaG90by1wYWdlfHx8fGVufDB8fHx8fA%3D%3D&auto=format&fit=crop&w=774&q=80"
        label="Escalator"
      />

      <Card
        imageSrc="https://images.unsplash.com/photo-1682685797229-b2930538da47?ixlib=rb-4.0.3&ixid=M3wxMjA3fDF8MHxwaG90by1wYWdlfHx8fGVufDB8fHx8fA%3D%3D&auto=format&fit=crop&w=774&q=80"
        label="Dry Land"
      />
    </div>
  );
}
As we can see, now we only need to write the UI for the card once and to use it, we can quickly call the Card component. imageSrc and label are custom props that we create. Props are a concept of data transmission from a parent component to a child component.
The number of props is unlimited; we can send data from a parent component to a child component as much as we want, using freely chosen alphabetical names. Custom props’ names can be chosen freely according to our design. The most important thing is to provide them within the UI declaration and then access them in our component using props.PROPS_NAME.
3️⃣ State Management
State is a concept of variables that can be declared within a component. The declaration involves providing a variable name, a setter function name for the variable, and its initial value.
const [count, setCount] = React.useState(0);To change the value of this state, we call its setter function and pass the new value into it.
// Set current 'count' value to previous 'count' value plus 1
setCount(count + 1)
When the state value changes, the UI components that use that state will be updated and re-rendered to display the latest state value.
Here’s a complete example of a simple implementation of using useState.
import React from 'react';

export default function App() {
  const [count, setCount] = React.useState(0);

  return (
    <div style={{
      display: 'flex',
      flexDirection: 'column',
      alignItems: 'center',
    }}>
      <button
        onClick={() => setCount(count + 1)}
      >
        Add
      </button>

      <p>
        {count}
      </p>

      <button
        onClick={() => setCount(count - 1)}
      >
        Subtract
      </button>
    </div>
  );
}
4️⃣ Lifecycle
Every component has a lifecycle, which consists of phases the component goes through, whether during initial rendering when the state is updated, or when the component finishes rendering. We can insert our desired commands in each of these phases, known as hooks.
Here’s a simple example of its usage.
export default function App() {
 React.useEffect(() => {
    alert('Called when component start rendering')

    return () => {
      alert('Called when component finish rendering')
    }
 }, [])

 // We can also attach variable as a trigger in useEffect
 React.useEffect(() => {
  alert("Called when component start rendering or state 'count' value changed")

    return () => {
      alert('Called when component finish rendering')
    }
 }, [count])

 return (
  <div></div>
 )
}
So, that concludes the discussion on the fundamental understanding of React.js. It can be considered one of the favourite options for developing web pages. You can gain further insight by starting to try it out.
At Upscalix, we always listen to our clients’ requirements and build a solution that suits their needs. Our team consists of the best talent in the industry with expertise in frontend, backend, and mobile app development.
Contact us here to build your digital solution now! Our team will listen to your requirements and suggest the best solution for your business.
This article written by Upscalix’s mobile developer Nova.